SIWES Report for Mechanical Engineering Students: Full Sample and Guide
Read a full SIWES report sample for Mechanical Engineering: maintenance and workshop tasks, tools, safety, chapters and a table of contents.

If you are a Mechanical Engineering student, your SIWES report has to show hands-on work: the machines you maintained, the parts you made, the tools you used and the safety rules you followed. "I learned a lot about machines" will not earn marks. "I replaced a worn bearing using a puller and checked the shaft alignment with a dial gauge" will.
Below is a full SIWES report sample for a Mechanical Engineering student placed in the maintenance and production workshop of a plastics factory, from the title page to the references.
About this sample. The student (Ibrahim Danladi), company (Westbridge Plastics Limited) and school (Sample University of Technology) are fictional. Use the sample to see the structure, level of detail and tone. Your machines, tasks and tools will be different, and your supervisor expects your own work, so do not copy it.
What makes a Mechanical Engineering report different
- Organise Chapter Three by phase of work, not as one long list. The sample groups work into safety induction, preventive maintenance, bearing replacement, compressor servicing, machining and record keeping, and each phase has its own heading.
- Explain the method, not only the task. For each job, say what you did, in what order, with which tool, and why that tool.
- Measurements matter. Say what you measured and with what instrument. Use only values you actually took or were given.
- Safety is part of the story. PPE, permits to work and isolation (lock out tag out) belong in the report.
- Include one detailed account of a key task with an aim, tools, numbered procedure, outcome and lesson learned.
- Link the work to your courses, for example machine design, thermodynamics, workshop practice or fluid mechanics.
Want a report like this from your own placement?
You can do it in a few minutes. Enter your details and a short summary of what you did, and the SIWES Report Generator writes the chapters in your school's format. Read Chapters One and Two free before you decide to unlock the rest.
The notes behind this sample
This is the short summary the sample was written from. Notice how much of the report grows out of a single paragraph about real tasks.
I started with a safety induction on PPE, permit to work and lock out tag out before working on any machine. In the maintenance section I helped carry out preventive maintenance on belt conveyors, gearboxes and electric motors, including checking lubrication levels, greasing bearings, checking belt tension and alignment, and replacing worn belts. I replaced worn bearings on a shaft using a bearing puller and checked shaft alignment with a straight edge and dial gauge. I serviced the air compressor by draining condensate, cleaning the intake filter and checking the oil level, and helped repair leaking pneumatic pipes and fittings. In the workshop I turned shafts and bushings on the lathe machine, drilled and ground parts for replacement, and carried out simple arc welding repairs on cracked brackets. I measured parts with a vernier caliper and a micrometer, tightened bolts with a torque wrench, and read engineering drawings to make replacement parts. I recorded breakdowns, jobs done and spare parts used in the maintenance log and helped the supervisor plan the weekly maintenance schedule.
Department of attachment: Maintenance and Production Workshop. Duration: 6 months (24 weeks). Equipment listed: lathe machine, drilling machine, bench grinder, arc welding machine, vernier caliper, micrometer, dial gauge, torque wrench, bearing puller, air compressor, grease gun, spanners and hand tools. Software: Microsoft Excel.
Full sample report
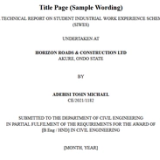
Cover page
TECHNICAL REPORT ON STUDENT INDUSTRIAL WORK EXPERIENCE SCHEME (SIWES)
AT
WESTBRIDGE PLASTICS LIMITED
Ota Industrial Estate, Ogun State
BY
IBRAHIM DANLADI
MEE/2021/0318
Department of Mechanical Engineering
Sample University of Technology
July 2026
Certification
This is to certify that Ibrahim Danladi with the Matriculation number MEE/2021/0318 of the Department of Mechanical Engineering, Sample University of Technology has completed his 6 months (24 weeks) Student Industrial Work Experience Scheme (SIWES) at Westbridge Plastics Limited, Ota Industrial Estate, Ogun State, from 2 February 2026 to 17 July 2026.
Institution Supervisor ______________________ Signature / Date ____________
SIWES Coordinator ______________________ Signature / Date ____________
Head of Department ______________________ Signature / Date ____________
Dedication
I dedicate this report to God Almighty, who gave me strength and good health throughout the six months of my industrial training.
I also dedicate it to my parents, whose prayers, encouragement and support made it possible for me to complete this programme successfully.
Finally, I dedicate this work to the maintenance supervisor and the workshop technicians at Westbridge Plastics Limited. Their patience and willingness to teach me practical skills made my training a truly valuable experience.
Acknowledgement
I sincerely thank my supervisor, Engr Musa Lawal, for his guidance, patience and corrections throughout my industrial training at Westbridge Plastics Limited. His advice helped me understand maintenance work and how to carry out tasks safely. I also thank the management and staff of Westbridge Plastics Limited for giving me the opportunity to train with them. The maintenance supervisor and the workshop technicians were always ready to explain procedures and show me how to use tools correctly. Their support made my learning easier and more practical.
I am grateful to Sample University of Technology and the Department of Mechanical Engineering for preparing me for this training. The knowledge I gained in the classroom made it easier for me to follow instructions in the workshop. I also appreciate my lecturers for their guidance before and during the SIWES programme. Finally, I thank my family and friends for their prayers, encouragement and support throughout the six months.
Abstract
During my six months (24 weeks) of industrial training at Westbridge Plastics Limited, I worked in the Maintenance and Production Workshop department under the direct supervision of the workshop supervisor. I began with a safety induction, where I learned the permit to work system and the lock out tag out procedure. After that, I joined the maintenance team for preventive maintenance on belt conveyors, gearboxes and electric motors, bearing replacement and shaft alignment, air compressor servicing, pneumatic pipe repairs, and machining work in the workshop. I turned shafts and bushings on the lathe, drilled and ground parts, and carried out simple arc welding repairs on cracked brackets. The tools I used most were the bearing puller, grease gun, torque wrench, vernier caliper, micrometer, dial gauge and straight edge. I also kept records of breakdowns, jobs done and spare parts used in the maintenance log, and helped plan the weekly maintenance schedule on Microsoft Excel. The training connected classroom courses like Machine Design, Maintenance Engineering, Fluid Mechanics and Workshop Practice to real machines, and it taught me the value of careful measurement, proper procedure and clear communication with a team.
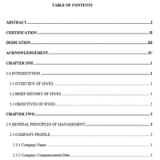
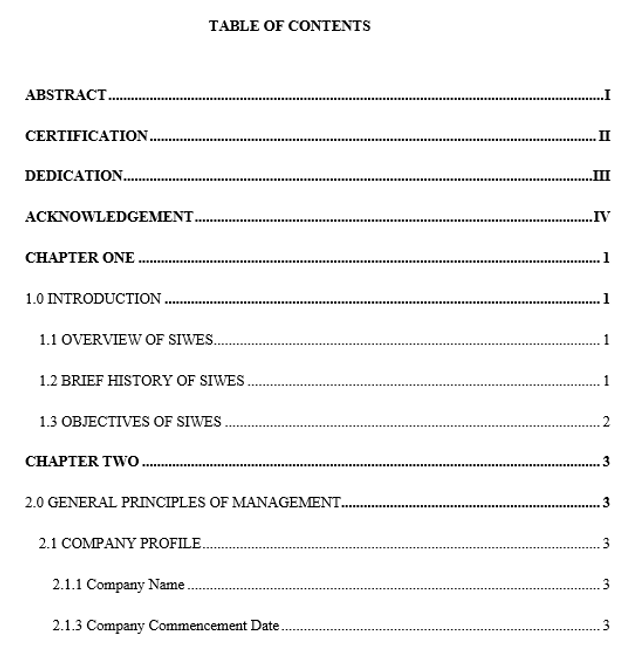
Table of contents
1Cover Page
2Certification
3Dedication
4Acknowledgement
5Abstract
6Table of Contents
7List of Figures
8
9Chapter One: Introduction
10    1.0 Introduction
11    1.1 Background of SIWES
12    1.2 Overview of the SIWES Programme
13    1.3 Aim and Objectives of SIWES
14    1.4 Significance of SIWES
15    1.5 Scope of This Report
16
17Chapter Two: Profile of the Organisation
18    2.0 Introduction
19    2.1 Brief History and Profile of the Organisation
20    2.2 Services and Operations
21    2.3 Vision and Mission
22    2.4 Organisational Structure
23    2.5 The Maintenance and Production Workshop
24
25Chapter Three: Experience Gained
26    3.0 Introduction
27    3.1 My Role and Supervision
28    3.2 Work Done During the Training
29        3.2.1 Weeks 1-2: Safety Induction and Plant Familiarisation
30        3.2.2 Weeks 3-8: Preventive Maintenance on Conveyors, Gearboxes and Motors
31        3.2.3 Weeks 9-13: Bearing Replacement and Shaft Alignment
32        3.2.4 Weeks 14-17: Air Compressor Servicing and Pneumatic Pipe Repairs
33        3.2.5 Weeks 18-21: Machining and Fabrication in the Workshop
34        3.2.6 Weeks 22-24: Measurement, Record Keeping and Maintenance Planning
35    3.3 Detailed Account of a Key Task
36    3.4 Tools, Equipment and Software Used
37    3.5 Skills Gained
38    3.6 Relation of the Training to My Course of Study
39    3.7 Observations and Contributions
40    3.8 Challenges Encountered and How They Were Handled
41
42Chapter Four: Conclusion, Limitations and Recommendations
43    4.1 Summary
44    4.2 Conclusion
45    4.3 Limitations
46    4.4 Recommendations
47
48References
List of figures
1Figure 2.1: Organisational chart
2Figure 3.1: Lock out tag out padlock and tag on the conveyor isolator
3Figure 3.2: Belt conveyor drive during the preventive maintenance check
4Figure 3.3: Bearing puller in use on the shaft during the bearing replacement
5Figure 3.4: Air compressor intake filter being cleaned during the service
6Figure 3.5: Shaft being turned on the lathe machine in the workshop
7Figure 3.6: Maintenance log book with the daily entries
8Figure 3.7: Dial gauge set up on the shaft for the alignment check
9Figure 3.8: Lathe machine in the workshop
10Figure 3.9: Vernier caliper and micrometer used for measurement
11Figure 3.10: PPE items issued for workshop use
Chapter One: Introduction
1.0 Introduction
This chapter gives the background of the Students' Industrial Work Experience Scheme, usually called SIWES. It explains how the scheme started, what it is meant to achieve, and why it matters to students in Nigerian tertiary institutions. The chapter also states the aim and objectives of the programme, its significance, and the scope of this report.
1.1 Background of SIWES
Before SIWES was introduced, many Nigerian graduates left school with good theoretical knowledge but very little practical skill. Employers often complained that these graduates could not handle simple workplace tasks or fit into real working environments. Industries reported that graduates were unfamiliar with working conditions, equipment and the processes used in their fields. This gap between what was taught in classrooms and what the workplace required became a serious concern for both schools and employers.
To solve this problem, the Industrial Training Fund (ITF) established SIWES in 1973. The ITF funded and ran the scheme in its early years. Management of the programme later involved the National Universities Commission (NUC) and the National Board for Technical Education (NBTE), before it returned to the ITF in 1984. Since then, SIWES has been run in relevant programmes across Nigerian tertiary institutions, particularly in science, engineering, technology, agriculture and management-related fields.
Sections 1.2 to 1.5 (overview of the SIWES programme, aim and objectives, significance of SIWES and scope of the report) follow the same pattern in every report, so we have not repeated them here.
How to write SIWES Chapter One
Chapter Two: Profile of the Organisation
2.0 Introduction
This chapter describes Westbridge Plastics Limited, the organisation where I completed my SIWES training. It covers the company's background and profile, the services and operations it carries out, and its vision and mission as I was able to observe them. The chapter also explains the organisational structure of the company and the position of the Maintenance and Production Workshop, where I was posted, within that structure. This background helps to show the kind of environment in which my training took place.
2.1 Brief History and Profile of the Organisation
Westbridge Plastics Limited is a manufacturing company located at Ota Industrial Estate in Ogun State. The company operates in the plastics and packaging sector of the manufacturing industry. Its main business is the production of plastic containers and packaging materials, which it supplies to food and beverage companies. The location of the company within an industrial estate places it close to other manufacturers, which supports the movement of raw materials and finished goods.
The company has grown over the years from a small production operation into a recognised supplier of plastic packaging in the region. This growth came mainly through steady demand from food and beverage producers who need safe and durable containers for their products. As demand increased, the company expanded its production capacity and improved the machines used on its lines. The management also placed more attention on keeping equipment in good condition, since production depends heavily on working machinery.
2.2 Services and Operations
The main activity of Westbridge Plastics Limited is the manufacture of plastic containers and packaging materials. These products are made for food and beverage companies that need containers for storing, transporting and displaying their goods. The company produces these items in different shapes and sizes to suit the needs of its customers. Production runs on machines that shape, mould and finish the plastic into usable containers. The finished products are then checked, sorted and prepared for delivery to buyers.
Day to day work at the company centres on meeting production targets while keeping quality steady. Raw plastic materials are fed into the production lines, and the machines are monitored to make sure the containers come out correctly. Workers inspect the output for defects such as weak walls, rough edges or poor finishing. Any machine that develops a fault is attended to quickly so that production is not delayed. In this way, the company serves its customers by supplying packaging materials they can rely on, and it also provides employment for people living around the industrial estate.
2.3 Vision and Mission
An official vision statement was not available to me during my training period. From what I observed, the company's long-term focus is on steady growth in plastic packaging production and on maintaining the trust of the food and beverage companies it supplies. This focus was clear in the way management spoke about quality and in the attention given to keeping machines running.
An official mission statement was also not available. The observable purpose of the company is to produce plastic containers and packaging materials that meet the needs of its customers while running its operations efficiently. Staff at different levels worked towards this same purpose in their daily duties.
2.4 Organisational Structure
Westbridge Plastics Limited runs on a clear chain of command. At the top is the management team, which handles decisions on production, finance, staffing and the general direction of the company. Below management are the heads of the various departments, who are responsible for the daily running of their sections. Each head of department reports to management and passes instructions down to the supervisors and workers under them. This arrangement keeps responsibilities clear and makes it easy to trace who is answerable for what.
The departments in the company do not work in isolation. Production depends on the maintenance team to keep machines in working order, and it also depends on stores to supply raw materials on time. Quality checks link the production floor with whoever handles inspection and dispatch. When a problem arises in one section, it is reported upward and across to the section that can solve it. This teamwork keeps the flow of work moving from raw material to finished product.
[Organisational chart goes here]
Figure 2.1: Organisational chart
Figure 2.1 shows the organisational structure of the company.
2.5 The Maintenance and Production Workshop
The Maintenance and Production Workshop is the unit where I was posted for my training. It handles the servicing, repair and general care of the machines used in production. Staff in the workshop carry out routine checks, attend to breakdowns and make sure equipment is safe to operate. The workshop also supports production by preparing machines before a run and correcting faults that could stop work.
The work of this workshop supports the rest of the company in a direct way. When machines are in good condition, production continues without unnecessary stops, and the company can meet its delivery promises to customers. The workshop therefore sits at the centre of the company's operations, linking the technical side of machine care with the production targets of the business. My own tasks within the workshop are described in Chapter Three.
Chapter Three: Experience Gained
3.0 Introduction
My six months of industrial training took place at Westbridge Plastics Limited, in the Maintenance and Production Workshop department. The training lasted for 24 weeks and covered both the maintenance of plant machines and the production of replacement parts in the workshop. This chapter describes the work I did, the skills I gained and the challenges I faced during the attachment. I have arranged the work in the order I performed it, starting from the safety induction up to the record keeping duties I handled near the end of the training.
3.1 My Role and Supervision
I worked as a maintenance and production assistant under the direct supervision of the workshop supervisor. Work was assigned to me each morning at the start of the shift, usually based on the breakdown reports from the previous day and the weekly maintenance plan. My supervisor explained each job before I started it, and he checked my work when I finished. For tasks like shaft measurement and bearing replacement, he inspected the finished part himself before it was taken to the production line. I was not allowed to work on any machine alone until I had shown that I understood the procedure and the safety requirements. This arrangement helped me learn the correct methods instead of guessing my way through jobs.
3.2 Work Done During the Training
3.2.1 Weeks 1-2: Safety Induction and Plant Familiarisation
My first two weeks were spent on safety induction before I was allowed near any machine. The safety officer took me through the use of personal protective equipment, which included safety boots, overalls, goggles, gloves and ear protection. I was taught the permit to work system, where a written permit must be issued before any maintenance job is carried out on a machine. The most important part of the induction was the lock out tag out procedure, which means isolating a machine from its power source, locking the isolator and keeping the key with the person doing the work.
I was shown how to switch off and isolate different machines, and how to confirm that a machine is truly dead before touching it. We practised the lock out tag out steps on a conveyor drive so that I could see how the padlock and tag are attached to the isolator. I also walked round the plant with the supervisor to identify the main machines, which included belt conveyors, gearboxes, electric motors, the air compressor and the pneumatic lines. He pointed out the emergency stop buttons and the location of the fire extinguishers in each section.
This induction taught me that safety in an engineering workshop is a procedure, not just a warning. In school we were told that machines are dangerous, but here I saw the actual steps that make them safe to work on. I learned that a machine can still be dangerous even after the switch is off, which is why isolation and verification come before any repair. The lock out tag out practice also showed me how a simple mistake, like leaving a key in an isolator, can put another person at risk.
[Your photo goes here]
Figure 3.1: Lock out tag out padlock and tag on the conveyor isolator
3.2.2 Weeks 3-8: Preventive Maintenance on Conveyors, Gearboxes and Motors
From the third week I joined the maintenance team for routine preventive maintenance on belt conveyors, gearboxes and electric motors. The work followed the weekly schedule, so each machine was attended to before it failed rather than after. On the conveyors, I checked belt tension and alignment, looked out for worn or frayed belts, and reported any belt that had started to run off the pulleys. On the gearboxes and electric motors, I checked lubrication levels, topped up oil where it was low, and greased the bearings through the grease nipples using a grease gun.
The method for each machine was similar. We first isolated the machine using the lock out tag out procedure, then cleaned the area around the inspection points before opening anything. For the gearbox, I removed the level plug and checked whether the oil was at the correct mark, then added the recommended oil if it was low. For the bearings, I wiped the grease nipple clean, attached the grease gun and pumped until fresh grease appeared at the seal. Belt tension was checked by pressing the belt at the middle of its span to feel the deflection, and alignment was checked by watching the belt run on the pulleys after switching the machine back on briefly.
I learned how preventive maintenance extends the life of machines and reduces sudden breakdowns on the production line. The lubrication work connected directly to what I studied about friction and wear in the Design of Machine Elements course. I also saw that over-greasing a bearing can be just as harmful as under-greasing, because excess grease can push out the seal. Checking belt tension taught me that a belt that is too tight loads the bearings, while one that is too loose slips and wears out quickly.
[Your photo goes here]
Figure 3.2: Belt conveyor drive during the preventive maintenance check
3.2.3 Weeks 9-13: Bearing Replacement and Shaft Alignment
During this period I was involved in replacing worn bearings on a shaft and checking shaft alignment after the replacement. The bearing had been identified as worn during the routine checks, so the machine was isolated and the shaft was removed for the job. I used a bearing puller to draw the old bearing off the shaft, taking care to pull evenly so that the shaft surface was not scored. The new bearing was cleaned and fitted onto the shaft, and I made sure it sat properly against the shoulder.
After fitting, I checked the shaft alignment using a straight edge and a dial gauge. The straight edge was placed along the shaft to give a quick check of any obvious misalignment, and the dial gauge was mounted so that its plunger touched the shaft surface. I rotated the shaft slowly and watched the needle movement on the gauge dial to see how much the shaft was out of line. Where the reading showed misalignment, the position was adjusted and the check was repeated until the shaft ran true. The machine was then reassembled and run briefly to confirm that the vibration and noise had reduced.
This job taught me the correct way to remove and fit a bearing without damaging the shaft or the bearing itself. I learned that a bearing puller spreads the pulling force evenly, unlike a hammer, which can dent the bearing races or burr the shaft. The alignment check showed me why a small misalignment can cause heavy vibration, heat and early bearing failure. It also made the dial gauge work we did in the workshop practice class easier to understand, because now I could see what the readings actually mean on a real machine.
[Your photo goes here]
Figure 3.3: Bearing puller in use on the shaft during the bearing replacement
3.2.4 Weeks 14-17: Air Compressor Servicing and Pneumatic Pipe Repairs
In this phase I serviced the air compressor and helped repair leaking pneumatic pipes and fittings. The compressor service started with draining the condensate from the receiver tank through the drain valve at the bottom. I then cleaned the intake filter, which had collected dust from the workshop air, and checked the oil level in the crankcase against the mark on the sight glass. Where the oil was low, I topped it up with the correct grade, and I checked around the machine for any oil leaks.
The pneumatic repairs followed the leaks that were reported on the lines feeding the production machines. I helped trace leaks by listening for the hiss of escaping air and by applying soapy water to joints and fittings, where bubbles showed the exact point of the leak. Once a leak was found, the section was isolated and the air drained from that line before any fitting was opened. We replaced worn seals, tightened loose fittings and changed damaged sections of hose or pipe, then restored the air supply and checked the joint again with soapy water.
Servicing the compressor taught me how moisture in compressed air is removed and why condensate must be drained regularly to protect the tools and cylinders downstream. I learned that a small air leak wastes a lot of energy because the compressor has to run longer to maintain pressure. The leak tracing method with soapy water was simple but effective, and it showed me that not every fault needs a big repair. This work also helped me understand the pneumatic circuits we covered in Fluid Mechanics and Machinery.
[Your photo goes here]
Figure 3.4: Air compressor intake filter being cleaned during the service
3.2.5 Weeks 18-21: Machining and Fabrication in the Workshop
In the workshop I turned shafts and bushings on the lathe machine, drilled and ground parts for replacement, and carried out simple arc welding repairs on cracked brackets. For each job I first read the engineering drawing to get the dimensions and shape of the part required. I then selected a piece of stock of the right size and mounted it in the lathe chuck, making sure it was held firmly and ran true before switching on. I faced the end, turned the outside diameter to size in a series of cuts, and checked the diameter with a vernier caliper as the work progressed.
For parts that needed holes, I used the drilling machine with the work clamped in a vice and the drill lined up with the marked centre. Grinding was done to clean up surfaces and bring worn parts back to a usable condition. The welding repairs were done on cracked brackets using arc welding, where I cleaned the crack area, tacked the bracket to hold it in position, then ran the weld along the crack. After welding, I chipped off the slag and inspected the weld for any visible defects.
Machining taught me the importance of taking light cuts and checking dimensions often instead of rushing to the final size. I learned that a vernier caliper must be read squarely and that the micrometer gives a finer reading for close tolerances. The welding work showed me how preparation of the joint affects the quality of the weld, because a dirty or badly fitted joint will not hold properly. Reading the engineering drawings for each job also improved my ability to turn a drawing into a finished part.
[Your photo goes here]
Figure 3.5: Shaft being turned on the lathe machine in the workshop
3.2.6 Weeks 22-24: Measurement, Record Keeping and Maintenance Planning
In the last weeks I combined workshop work with record keeping and planning duties. I measured parts with a vernier caliper and a micrometer before they were fitted or taken to the line, and I tightened bolts with a torque wrench to the specified torque where the drawing or the supervisor gave a value. I recorded breakdowns, jobs done and spare parts used in the maintenance log each day. I also helped the supervisor plan the weekly maintenance schedule by listing the machines due for service and the parts that would be needed.
The record keeping followed a simple routine. For each job I wrote the date, the machine, the fault reported, the work carried out and the parts used, so that the history of each machine could be traced later. When planning the weekly schedule, we looked at the log to see which machines were due for their routine checks and which ones had been breaking down often. The spare parts list was prepared from the log so that the store could be checked before the work started, which avoided delays when a part was not available.
This phase showed me that maintenance is not complete until it is recorded. The log made it easy to see repeated faults on the same machine and to plan ahead instead of reacting to breakdowns. I learned that a torque wrench must be set to the correct value and not used to guess tightness, because too much torque can strip threads or stretch bolts. Keeping records also improved my attention to detail, since every entry had to match the actual work done on the machine.
[Your photo goes here]
Figure 3.6: Maintenance log book with the daily entries
3.3 Detailed Account of a Key Task
Aim: To replace a worn bearing on a shaft and check the shaft alignment after the replacement, so that the machine would run without excessive vibration.
Tools and materials: Bearing puller, new bearing, straight edge, dial gauge, spanner set, mallet, cleaning cloth and grease.
Procedure:
- The machine was switched off and isolated using the lock out tag out procedure, and the key was kept with me while the work was going on.
- The shaft was removed from the machine and placed on the workbench, and the area around the worn bearing was cleaned.
- The bearing puller was fitted onto the old bearing, with the jaws gripping the inner race, and the centre screw was turned gradually to draw the bearing off the shaft evenly.
- The shaft seat was cleaned and checked for burrs or scores, and the new bearing was cleaned and fitted onto the shaft until it sat against the shoulder.
- A straight edge was placed along the shaft as a quick check for any obvious misalignment.
- The dial gauge was mounted with its plunger touching the shaft surface, and the shaft was rotated slowly while I watched the needle movement on the dial.
- Where the reading showed misalignment, the position was adjusted and the dial gauge check was repeated until the shaft ran true.
- The shaft was reassembled into the machine, the machine was switched on briefly, and the vibration and noise were checked before it was returned to service.
Outcome: The worn bearing was removed and replaced successfully, and the shaft was aligned so that the machine ran smoothly with reduced vibration. The repair brought the machine back into service without waiting for a new shaft or a replacement unit. The job was completed within the maintenance window, so the production line did not lose extra time.
Lesson learned: I learned the correct procedure for removing and fitting a bearing using a puller, which protects both the shaft and the new bearing from damage. The alignment check with the dial gauge showed me how small errors in shaft alignment cause vibration and early bearing failure. I also learned that proper isolation before starting the job is what makes the whole repair safe.
[Your photo goes here]
Figure 3.7: Dial gauge set up on the shaft for the alignment check
3.4 Tools, Equipment and Software Used
The main machines I worked on during the attachment were the belt conveyors, gearboxes and electric motors in the production line. I helped carry out preventive maintenance on these machines by checking lubrication levels, greasing bearings and inspecting belt tension and alignment. I also worked on the air compressor, where I drained condensate, cleaned the intake filter and checked the oil level. These machines are the backbone of the production process, so keeping them in good condition was a daily responsibility.
The lathe machine was the main machine tool I used in the workshop. I turned shafts and bushings on it whenever replacement parts were needed for the plant. I also used the drilling machine to drill holes in parts and the bench grinder to grind and finish surfaces before fitting. The arc welding machine was used for simple repair work, such as joining cracked brackets that could not be replaced immediately.
[Your photo goes here]
Figure 3.8: Lathe machine in the workshop
The bearing puller was one of the most useful hand tools I used. I used it to remove worn bearings from shafts without damaging the shaft surface. For tightening and loosening bolts during maintenance, I used spanners and a torque wrench, especially where the manufacturer's tightening torque had to be followed. The grease gun was used to apply grease to bearings during routine servicing of motors and conveyors.
For measurement and inspection, I used a vernier caliper and a micrometer to measure the dimensions of parts before and after machining. These readings helped me confirm whether a part was still within the required tolerance or needed to be replaced. I also used a dial gauge and a straight edge to check shaft alignment after replacing bearings, since misalignment can cause vibration and early failure. These instruments taught me that accuracy in measurement is just as important as the actual repair work.
[Your photo goes here]
Figure 3.9: Vernier caliper and micrometer used for measurement
Safety equipment was a major part of my daily work. Before I was allowed near any machine, I went through a safety induction that covered the use of personal protective equipment, the permit to work system and lock out tag out procedures. I wore overalls, safety boots, gloves and goggles depending on the task. Lock out tag out was applied before any maintenance work on a machine so that it could not be started while someone was still working on it.
[Your photo goes here]
Figure 3.10: PPE items issued for workshop use
For record keeping, I used Microsoft Excel to help the supervisor plan the weekly maintenance schedule. I entered jobs, breakdowns and spare parts used into the schedule, which made it easier to see which machines were due for service. I also wrote entries in the maintenance log, recording breakdowns, jobs done and spare parts used. The log helped the department track repeated faults and plan spare parts purchases.
3.5 Skills Gained
Technical Skills
I gained practical experience in preventive maintenance of rotating equipment. I learned how to check lubrication levels, grease bearings, check belt tension and alignment, and replace worn belts on conveyors. I also learned how to replace bearings on a shaft using a bearing puller and how to confirm alignment with a straight edge and dial gauge. These are skills I had only read about in textbooks before the attachment.
I also gained hands-on machining and fitting skills. I turned shafts and bushings on the lathe, drilled and ground parts for replacement, and carried out simple arc welding repairs on cracked brackets. I measured parts with a vernier caliper and micrometer and tightened bolts to the correct torque. I also learned how to read engineering drawings and use them to produce replacement parts. Working on the air compressor taught me how to drain condensate, clean intake filters and check oil levels.
Soft Skills
The attachment improved my teamwork and communication skills. I worked with the maintenance team during repairs, and we had to coordinate so that production was not interrupted for too long. I learned to report faults clearly to the supervisor and to ask questions when I was not sure of a procedure. Time management was also important, since maintenance jobs had to be completed within the time given by the production section. I also developed problem-solving skills by tracing faults such as air leaks in pneumatic pipes and deciding the best way to repair them.
3.6 Relation of the Training to My Course of Study
The training connected directly to several courses I have taken in Mechanical Engineering. Preventive maintenance of conveyors, gearboxes and electric motors relates to Machine Design and Maintenance Engineering, where we studied wear, lubrication and failure of machine elements. Replacing bearings and checking shaft alignment connected to the topics of fits, tolerances and shaft design. Working on the air compressor and pneumatic pipes linked to Fluid Mechanics and Thermodynamics, since I saw how compressed air is generated, stored and distributed in a plant.
The machining work in the workshop related to Manufacturing Technology and Workshop Practice. Turning, drilling, grinding and arc welding are processes we studied in theory, but doing them myself helped me understand feed, speed, depth of cut and the importance of measurement. Reading engineering drawings and producing replacement parts connected to Engineering Drawing. The training added what the classroom could not give: the feel of the machines, the discipline of following safety procedures, and the experience of working under real production pressure.
3.7 Observations and Contributions
What stood out most to me was how much planning goes into maintenance work in a real plant. In school, we often solve problems on paper with all the conditions given, but in the workshop, the machine has to be stopped, the area made safe, and production informed before any work starts. I also observed that record keeping is taken seriously. The maintenance log and weekly schedule were used to track faults and plan spare parts, which is something I had not appreciated before. Safety was not treated as a formality; the permit to work and lock out tag out procedures were followed every time.
My main contribution was in the routine maintenance of the conveyors, gearboxes and motors, where I helped with greasing, belt checks and bearing replacement. I also helped service the air compressor and repaired leaking pneumatic pipes and fittings. In the workshop, I produced replacement shafts, bushings and brackets that were used on the plant. I also assisted the supervisor in planning the weekly maintenance schedule and kept the maintenance log updated with jobs done and spare parts used.
3.8 Challenges Encountered and How They Were Handled
One challenge I faced was removing worn bearings without damaging the shaft. The first time I tried, I applied force at the wrong point and the puller kept slipping. The supervisor corrected me and showed me how to position the puller legs properly behind the bearing inner ring and apply steady pressure. I learned that bearing removal requires patience and the right tool, and that forcing a part can cause more damage than the original fault.
Another challenge was tracing air leaks in the pneumatic system. A leak can occur at any joint or fitting, and the compressor kept losing pressure without an obvious cause. I learned to work through the line section by section, checking fittings and pipes with soapy water so that escaping air would show as bubbles. This taught me to be systematic when troubleshooting instead of guessing. I also found it hard at first to read some engineering drawings, but with practice and guidance from the supervisor, I became more confident in interpreting dimensions and producing parts that fitted correctly.
Need Chapter Three for your own workshop placement?
Tell the generator which machines you worked on, which tools you used and what you did, and it writes each phase in this method-first format, with a detailed account of one key task. Preview Chapters One and Two free.
Chapter Four: Conclusion, Limitations and Recommendations
4.1 Summary
My industrial training took place at Westbridge Plastics Limited in the Maintenance and Production Workshop department. It lasted for six months, which is 24 weeks, and covered both the maintenance of plant machines and the production of replacement parts. I started with a safety induction in the first two weeks, where I learned the permit to work system and the lock out tag out procedure before I was allowed near any machine. After that I joined the maintenance team for routine work on belt conveyors, gearboxes and electric motors.
The main tasks I handled included preventive maintenance, bearing replacement and shaft alignment, air compressor servicing, pneumatic pipe repairs, and machining work in the workshop. I turned shafts and bushings on the lathe, drilled and ground parts, and carried out simple arc welding repairs on cracked brackets. The tools I used most were the bearing puller, grease gun, spanners, torque wrench, vernier caliper, micrometer, dial gauge and straight edge. I also kept records of breakdowns, jobs done and spare parts used in the maintenance log, and helped plan the weekly maintenance schedule on Microsoft Excel.
4.2 Conclusion
The 24 weeks of training gave me practical experience that classroom work alone could not provide. I learned how preventive maintenance is planned and carried out on real machines, and I saw how lubrication, belt tension and alignment affect the life of equipment. The attachment connected directly to courses like Machine Design, Maintenance Engineering, Fluid Mechanics and Workshop Practice. Topics I had only read about, such as fits, tolerances and shaft alignment, became clear when I worked on actual machines.
I plan to use what I learned in my remaining coursework and in my future career. The measurement and machining skills will help me in design and workshop courses, and the maintenance experience will be useful if I work in a plant or production environment. I also learned the value of following safety procedures and asking questions when I was not sure of a step. The training showed me that engineering work depends on careful measurement, proper procedure and clear communication with a team.
4.3 Limitations
One main limitation was the delay in getting some spare parts. When a part was not available in the store, the repair had to wait until a replacement arrived, and this slowed down the maintenance schedule. On some days I could not complete a job I had started because the part was still pending. This affected the number of repairs I could take part in during those periods.
Another limitation was that I could only operate the machines under supervision. I was not allowed to work on any machine alone until I had shown that I understood the procedure and the safety requirements. This was good for safety, but it also meant that I could not practise some tasks as often as I would have liked. These limitations could be reduced in future placements if spare parts are stocked in advance and if students are given more supervised practice time on each task.
4.4 Recommendations
The following recommendations are based on my experience during the attachment.
To the institution and the ITF:
- Arrange a short machine safety training for students before they report to their place of attachment.
- Strengthen follow-up visits to confirm that students are actually gaining hands-on experience.
- Provide a clear logbook format so students can record tasks and tools used properly.
To the host organisation:
- Give students a short machine safety training before they start work in the workshop.
- Set aside time for students to practise each task under supervision.
- Keep common spare parts in stock so that repairs are not delayed.
To future SIWES students:
- Take the safety induction seriously and follow every procedure, especially lock out tag out.
- Ask questions when a procedure is not clear instead of guessing.
- Keep a daily record of the jobs you do and the tools you use, because it makes report writing easier.
References
- Industrial Training Fund. (n.d.). Students Industrial Work Experience Scheme (SIWES). https://itf.gov.ng/pdf/SIWES%20Work.pdf
- Monoed. (2025, October 4). The history of SIWES in NigeriEverything you need to know. https://monoed.africa/blog/history-of-siwes-in-nigeria
- Council for the Regulation of Engineering in Nigeria. (n.d.). About COREN. https://www.coren.gov.ng/
- Microsoft. (n.d.). Microsoft 365 documentation. https://support.microsoft.com/microsoft-365
- Lathe Machine. (n.d.). In Wikipedia. https://en.wikipedia.org/w/index.php?title=Lathe_Machine
- Drilling Machine. (n.d.). In Wikipedia. https://en.wikipedia.org/w/index.php?title=Drilling_Machine
- Bench Grinder. (n.d.). In Wikipedia. https://en.wikipedia.org/w/index.php?title=Bench_Grinder
- Kolb, D. A. (2015). Experiential learning: Experience as the source of learning and development (2nd ed.). Pearson Education.
How to adapt this sample to your own placement
Your placement may not be a plastics factory. The structure stays the same; the machines and tasks change.
- Automobile workshop: group Chapter Three by system, such as engine servicing, brakes, suspension, electrical and diagnostics. Name the tools and the scan or test equipment you used.
- Oil and gas or process plant: describe the equipment you worked around (pumps, compressors, valves, heat exchangers), the maintenance you took part in, and the permit and safety system the site used.
- Fabrication or welding shop: group by process (cutting, fitting, welding, finishing) and explain how you read drawings and checked dimensions.
- Power plant or utility: describe the plant sections you were attached to, routine checks, and what you observed about operation and maintenance.
- HVAC and refrigeration: write up installations, servicing and fault finding, with the tools and refrigerant safety rules you followed.
- Only describe what you did. If you observed a job without doing it, say "I observed". Never add tasks, machines or measurements you did not handle.
A shorter, three-month report
Some engineering programmes include a shorter placement at 300 level and a longer one at 400 level. For the three-month report, write fewer phases (three or four instead of six), keep the same layout, and still include one detailed key task. 👉 How long does SIWES last
Tips for a strong Mechanical Engineering report
- Take notes every day. Write the machine, the job and the tools while it is fresh. How to fill your SIWES logbook as an Engineering student
- Group your work into phases and give each one a clear heading and a time frame.
- Name every machine and tool, and say what it does and how you used it.
- Write procedures in the first person and the past tense, in the order you did them.
- Choose one key task and describe it in depth: aim, tools, numbered steps, outcome, lesson learned.
- Use real numbers only. If you recorded a torque value, clearance or dimension, include it. If you did not, describe the method without inventing figures.
- Add photos and sketches where you are allowed. Ask your supervisor first, because some plants restrict photography.
- Cover safety: PPE, permit to work, isolation and lock out tag out.
- Connect the work to your own courses by name.
- Check your school's format first. Some schools use five chapters instead of four.
Write yours the easy way
Writing a report like this by hand takes days. The SIWES Report Generator does the heavy lifting from your own notes.
- Matches your school's format, with four or five chapters.
- Phase-by-phase Chapter Three with a detailed account of a key task.
- Choose which pages to include: certification, dedication, acknowledgement, abstract or Report Overview, table of contents and list of figures.
- Numbered figure captions ready for your photos.
- Print-ready Word or PDF file.
- Free preview of Chapters One and Two.
FAQs
What should I write in Chapter Three of a Mechanical Engineering SIWES report?
The work you did, grouped by phase or area, such as maintenance, machining and welding. For each, explain what you did, the steps, the tools and the lesson. Add a detailed account of one key task, and sections on tools, skills, how the work relates to your courses, and challenges.
Should I include measurements and technical values?
Yes, if you took them or were given them, such as a torque setting or a measured diameter. Do not invent values. If you do not have them, describe the method.
How long is SIWES for Mechanical Engineering students?
It depends on your school. Some engineering programmes use a shorter placement at 300 level and a longer one at 400 level, while others run a single six-month placement. Check your SIWES handbook.
Can I use this sample as my SIWES report?
No. The names, company and tasks are fictional, and your supervisor expects your own experience. Use it for structure and level of detail, then write about your own placement.
Can I take photos of machines for my report?
Ask your supervisor first. Many plants restrict photography for safety or confidentiality. If you cannot take photos, use labelled sketches instead.
Do I have to describe safety procedures?
Yes. Safety induction, PPE and procedures like permit to work and lock out tag out show that you worked responsibly, and they are worth including in the report.
Does a Mechanical Engineering report use four or five chapters?
It depends on your school. Many use four chapters, while some use five. In a five-chapter format, the work done and the equipment and experience go into separate chapters.
Does the SIWES Report Generator work for engineering courses?
Yes. It writes Chapter Three by phase of work from the tasks and tools you list, with a detailed account of one key task. Check the result and add your own details before you submit.
About the Author
Mohammad-Jamiu B. Balogun, GMNSE
AI Security Researcher · Founder, MonoEd Africa
Mohammad-Jamiu is a First-Class Telecommunications Engineer and Best Graduating Student, BUK '24, and an AI security researcher. He founded MonoEd Africa to give Nigerian students AI-powered academic tools — from SIWES logbooks to final year projects. His work has reached over 10,000 students across Nigeria.